This is a great little quickie gift you can make in a hurry, but it looks like you took awhile to make it! So go stock up on some 4�x 6� notepads, the kind where the top cover flips up, so you can make these whenever you have a few minutes to spare. Think of the ready made gifts you will have for holiday rush.
Supplies used for this project:
The notepad I used is about �� thick. This will make a difference in the measurements if you use one that is of a different size. So, follow these directions but use your own measurements.
Once you have determined that the cover will fit around your notepad, it is time to color and stamp it.
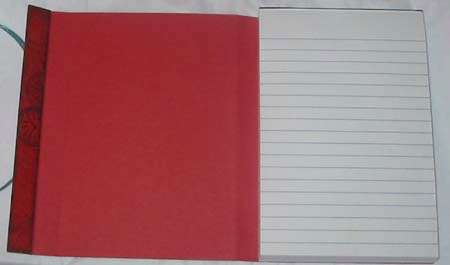
Cut the front cover off of the notepad close to the binding but be careful not to cut the glued binding or you might lose pages. Glue the back of the notepad to the inside of the back portion of your cover with Mod Podge or other clear drying clue. Allow the glue to dry well.
To attach the sheer ribbon that will hold the cover closed, cut a slit into the center of the extra 3/4� flap. Cut two pieces of sheer ribbon long enough to go around the book and allow for tying. Slip the ends of both pieces into the flat slit you cut in the flap, going from the outside to the inside. Pull about 1� of the ribbons thru the slit and glue each one flat down on the flap, going in each direction. Here is a photo of what I mean.
Shade and stamp the extra piece of cardstock that was ��x 6� the same as the outer cover design. Glue this on the inside of the flap and over the ribbon ends as shown in this picture.
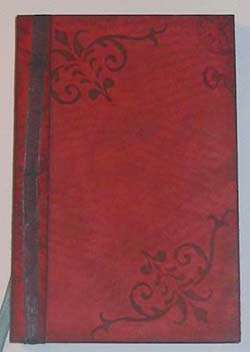
Now simply close the cover all around the book, with the extra flap ending at the back of the book. Now pull the ribbons around the book, one up and one down, so they meet in the front and tie to help the cover stay closed. Have questions? Email me!
Notepad Cover By Sharon 'Harry' Solly
Place your notepad onto your cardstock and trace it onto the cardstock with a pencil. Now, roll the pad onto it�s side, leaving the back cover flush along the line you just traced and trace the front side of the pad. Now continue on and roll the pad over again so that it is now on the front cover, with the side still next to the line you just made. Trace the outer edge as before, and then one more roll onto the small side and trace it as well. You should now have a line pattern of your notepad that looks like this: 4�x 6�, �� x 6�, 4�x 6�, �� x 6�. Add a flap to the last �� side that is about �� x 6�. Now cut the outer edges out so that it is all one large piece. Using a stylus tool or a bone folder, score the lines so that the cover will fold around your notepad. Test to be sure it fits your notepad before you stamp and color it.
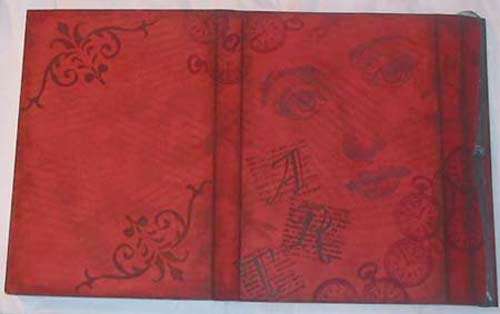
Stamp the Script image repeatedly over the entire outer cover with Tea Dye Distress ink.
Stamp the Small Clock image diagonally across the cover as shown with Raisin Adirondack ink.
Stamp the Large Scroll on the back cover area as shown with Vintage Photo Distress ink.
Stamp the ART word image, masking the other letters on the rubber when you ink it so that you can stamp the letters individually, with Vintage Photo Distress ink. If the letters are not dark enough you can always go over them with a permanent marker.
Stamp the Dragonfly only of the Dragonfly Spiral image with Raisin Adirondack ink repeatedly over the cover.
Stamp the Face image with India Ink Black permanent ink.
Shade the edges of each area of the cover with Vintage Photo Distress inks using a sponge.