
I have had this frame that holds three pictures for some time now that I had found at the local dollar store. It was a cheap brown plastic frame, not too much to look at except for the shape. So, with some paint, pretty paper, great Oriental images and a classic Buddha quote I turned this cheap frame into something that is so much better looking!
Supplies used for this project:
Stamp the Geisha image onto white copy paper with India Ink Black permanent ink. Paint the image with the Radiant Pearls listed above. Allow the paint to dry completely, and then cut out the image closely. Set aside.
Clean the frame and dry it well. Paint the frame completely with Red craft acrylic paint. If the frame shows thru the paint, paint another coat onto it once the first one has dried.
Paint the chopsticks with Red Craft acrylic paints and allow them to dry well. Ink the Chinese Newspaper print stamp with India Ink Black permanent ink and lay it inked side up on your table. Roll the painted chopsticks over the inked stamp very slowly. Set the chopsticks aside to dry.
Paint the Bamboo Bead with Metallic Gold acrylic paint. Allow the paint to dry well. Punch the Good Luck symbol punch into a scrap piece of cardstock. Place the scrap paper with the punched area over the painted bead. Apply India Ink Black permanent ink to the bead thru the punch onto the bead with a sponge. Heat set the ink.Seal the bead with a coat of Water based Varnish and allow to dry well. Wrap the bottom portion of the bead as shown with Red embroidery floss and glue the ends to the bead with Gel Medium or E6000. Make a lanyard with the Black Nylon cording out of square knots that is about 1 �� long. String the cords thru the bead�s two holes and tie three more square knots underneath the bead as shown. To make sure it does not unravel, I burned the cut ends of the nylon cording which melted them onto the knots. Make a tassel from Red embroidery floss that is roughly 1 �� long and tie it off with Gold Metallic embroidery thread. String the tassel onto the bottom of the square knot lanyard. If you do not want the red thread to show thru the black cording, color it with a Black Sharpie marker. Set the beaded lanyard aside for now.
Cut three red cardstock panels that are roughly 2 ��x 4 1/8�. Stamp the Square Border image onto the top of two of the panels an along two sides of the other panel using Versamark Watermark ink. Cover the stamped images with Antique Gold embossing powder. Pour off excess powder. Make sure to remove all excess bits of stray powder before you heat the image so that you won�t have bits of gold where you do not want them. I do this with a fine paintbrush. Heat the images with your heat gun to emboss the powder. Shade the edges of each panel with India Ink Black permanent ink using a sponge. Go over the black edges with the edge of the Encore Metallic Gold pigment ink to edge them in gold. Set the panels aside for now.
Trim the printed quote into separate pieces as shown in the picture above. Shade the edges of each strip with Raisin ink using a sponge. Color a scrap piece of white cardstock with Memories Mango permanent ink using a sponge (or use a similar colored cardstock. I had none so had to make do!). Glue each strip of the quote onto the Mango colored paper with Mod Podge and trim the edges close so that you have a think border of Mango showing. Glue the quote strips onto the red panels as shown using Mod Podge.
Cut a piece of the Antique Asian Writing Rusty Pickle paper to fit inside the frame. Place the paper inside the frame and add the backing panel of the frame on top to secure it in place. (I left the glass out of mine) Lay the frame on your table and glue the red cardstock panels into each area as shown, making sure that you put the panels in order so the quote will read right. Glue the Geisha image inside the second frame with Mode Podge.
Altered Asian Frame By Sharon 'Harry' Solly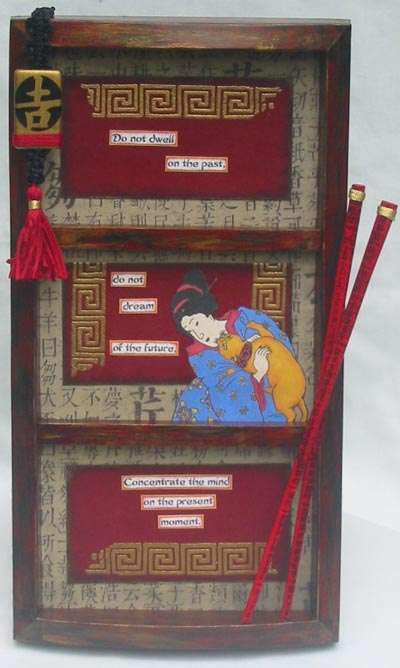
Scruff up the red paint now by dry brushing on Black craft acrylic paint, making sure that your brush is dry; do not soak it in paint. To do this, dip your brush tip into the paint then pounce the brush onto a piece of paper toweling or scrap paper. Be sure to leave red paint showing, do not cover it all up with the black paint. Allow the black paint to dry well.
Repeat the dry brush technique with the Metallic Gold acrylic paint and allow it to dry well.
Once all the paint has dried on the frame, seal it well with several coats of Matte Indoor/Outdoor water based Varnish, allowing each coat to dry in between.
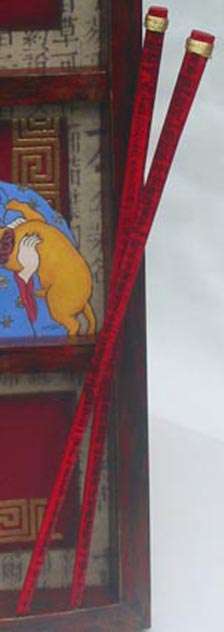
Once the ink has dried completely, paint a coat of Future Floor Finish to seal them. Since this was wood I used this instead of the Varnish, as the Varnish will crackle some paints if there is any water present at all. (Though that is a cool effect that I have done on purpose with Twinkling H2O�s!) Set the chopsticks aside to dry well. Wrap the top ends of the chopsticks with Metallic Gold embroidery thread and glue the ends with Gel Medium or Glue. Set aside.
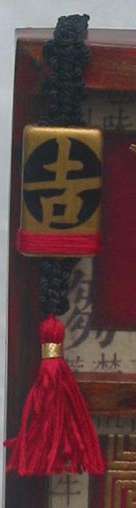
Set the frame upright and glue the beaded lanyard in place on the top left corner of the frame with E6000 glue. Glue the two chopsticks onto the right lower side of the frame as shown with E6000 as well. Allow the glue to set completely before moving the frame around much.
I hope you try something similar to one of your dollar store finds. Be sure to take a second look at all the tacky frames that can be found for next to nothing these days. With a little paint or stamping, they can be transformed into works of art! Happy altering. If you have any questions, email me.